
 MOCKO


How to Present a Mobile App Using PSD Mockups
How to prepare your app screens, choose the right iPhone mockups and turn them into client presentations, portfolio cases and launch posts.

On this page
A strong app presentation does more than show screens. It shows the app in someone's hand, on a desk, in real light, so people instantly understand what it is and who it's for. iPhone mockups are the quickest way to get there, whether you're pitching a client, building a portfolio case or preparing a launch post.
Short answer: export your app screens at the device's native resolution, choose a few iPhone mockups in one visual style, replace each mockup's screen smart object with a screen, then arrange the results into a client deck, a portfolio case or launch posts.
This guide covers how to prepare your screens, pick the right mockups, put your design inside them and turn the results into presentations, social posts and store visuals.
Why use iPhone mockups for app presentations?
- Context. A screen inside a real phone, held by a real hand, reads as a product, not a design file.
- Credibility. Polished visuals make an early-stage app feel trustworthy to clients, investors and first users.
- Clarity for clients. Non-designers understand size, layout and flow much better when they see the screen on a device.
- Speed. A ready-made mockup takes minutes, compared with a day of photography and retouching.
- Flexibility. One set of screenshots can go into many scenes: studio shots for the portfolio, lifestyle shots for social media, close-ups for feature highlights.
Step-by-step guide
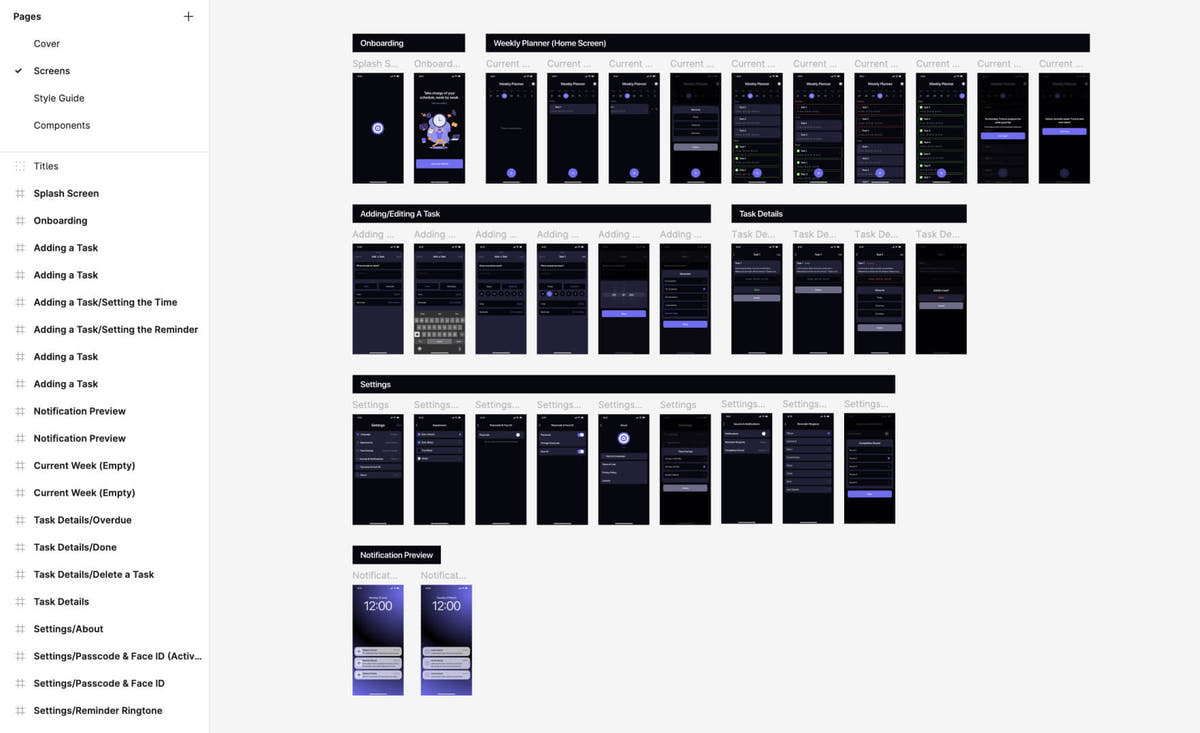
Step 1: Prepare your app screens
Export the screens you want to show at full resolution from your design tool, or take screenshots from a simulator or a real device. Pick the moments that tell the story: the first screen people see, the core action, and one or two screens that make the app different.
Export at the device's native size if you can. A screen that's too small will look blurry once it's placed into a high-resolution mockup.
Step 2: Choose your iPhone mockups
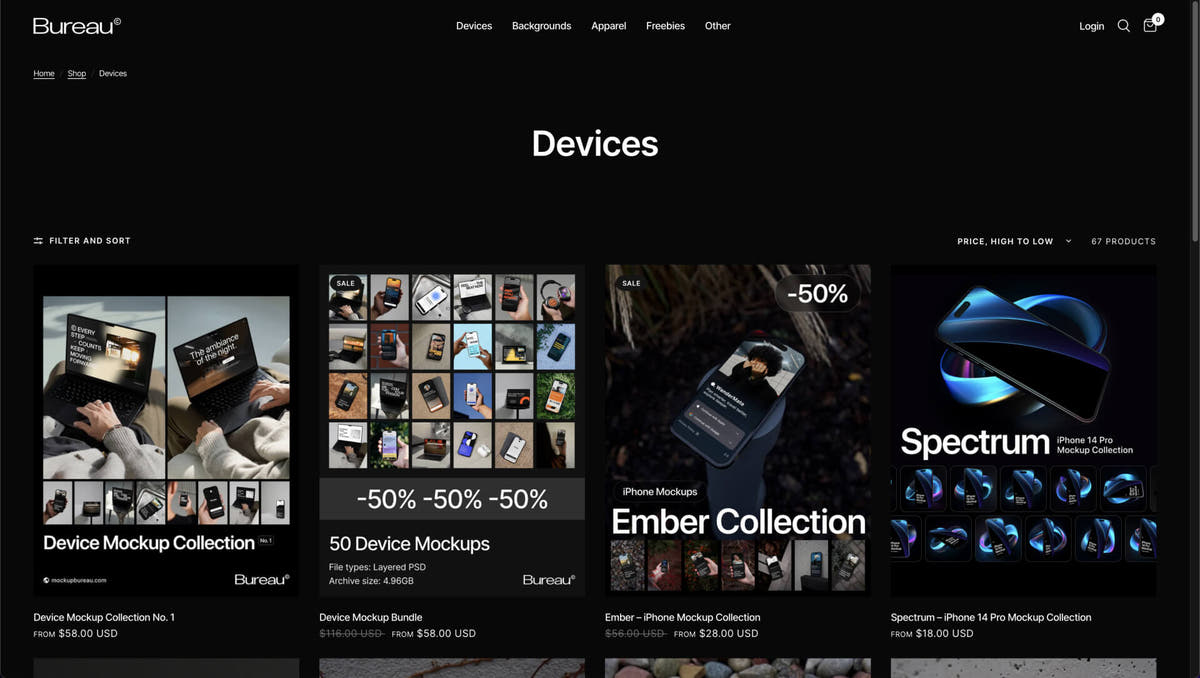
Browse our device mockups and pick scenes that fit the app's personality. A clean studio shot suits productivity and finance apps. A phone in hand at a café works for lifestyle and social apps. Bold colors and dramatic light suit games and entertainment.
Try to pick two or three scenes from the same series, so the lighting and style stay consistent across your whole presentation.
Step 3: Put your screens into the mockup
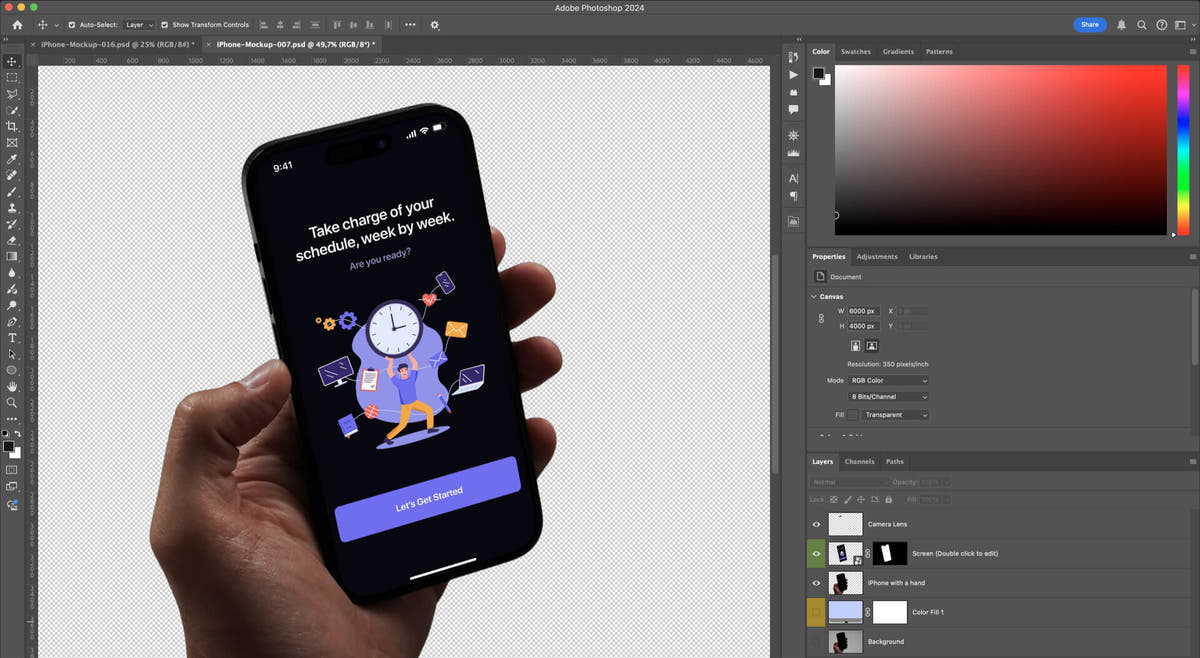
Open the PSD in Photoshop and find the smart object layer, usually called "Screen" or "Place Your Design Here". Double-click its thumbnail, paste your screenshot, scale it to fill the canvas, then save and close. The screen now sits inside the phone with the right perspective, reflections and shadows.
New to smart objects? Our step-by-step guide to using a PSD mockup explains every click.
Step 4: Export and use your visuals
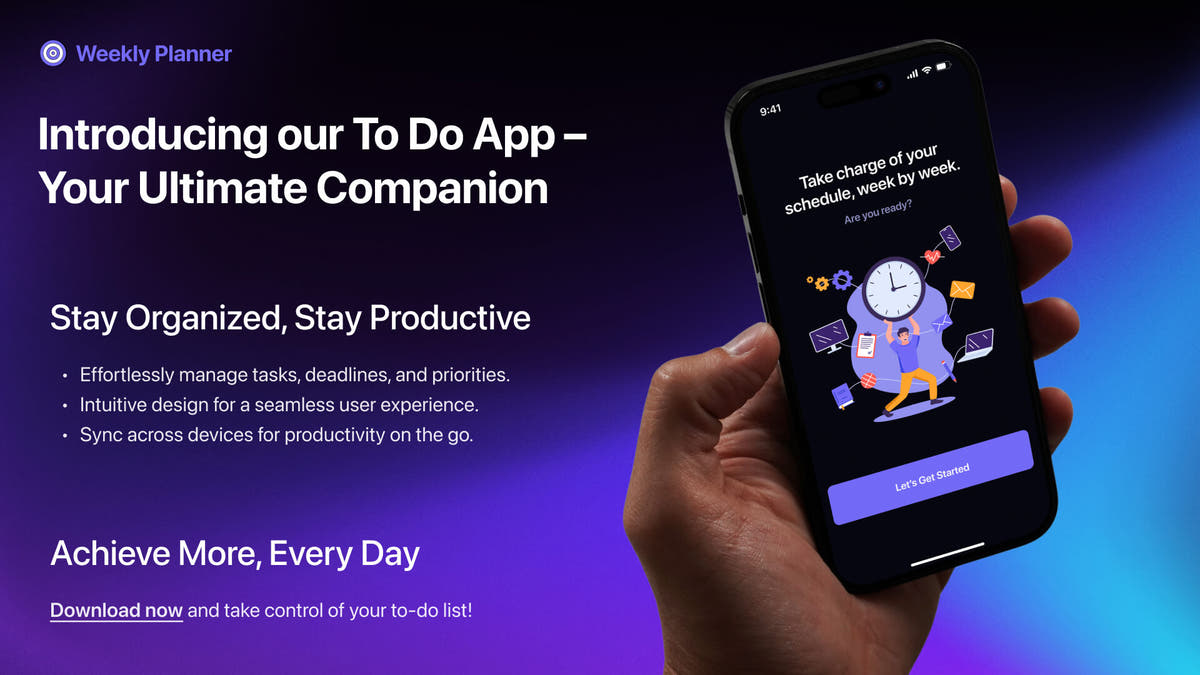
Export each scene as a high-quality JPEG or PNG. Then put the images to work:
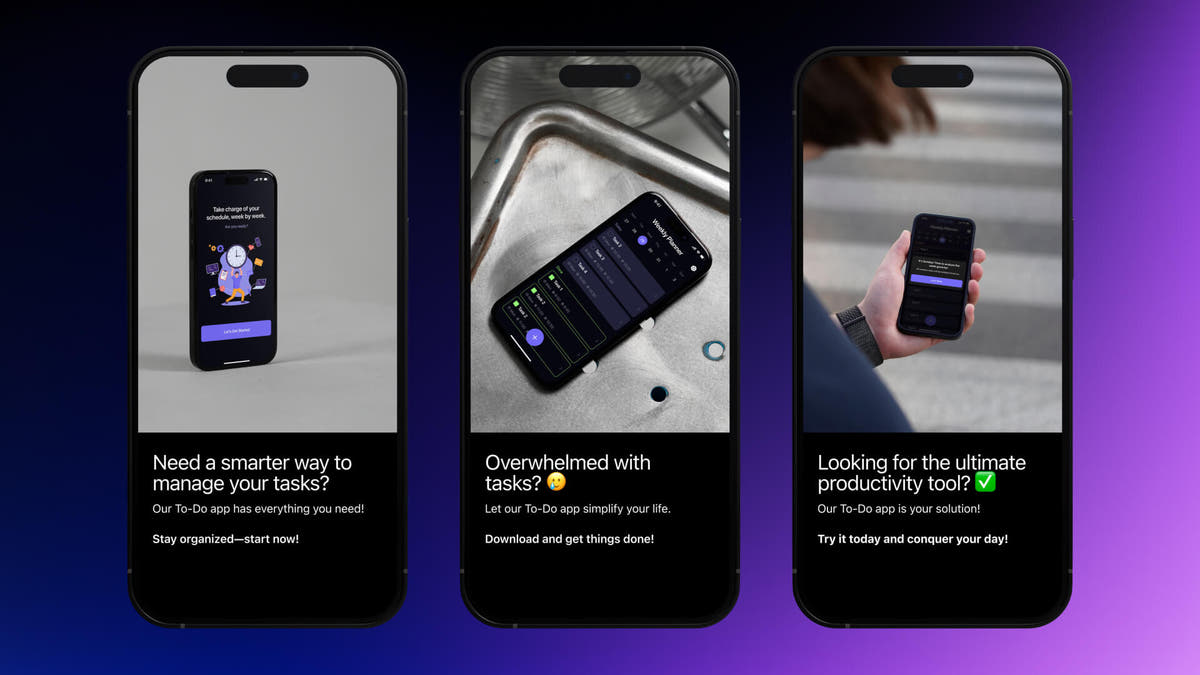
- Client presentations. Open with a hero shot, then walk through the flow screen by screen.
- Portfolio cases. Mix wide lifestyle scenes with close-ups of key screens.
- Social media. Short carousels and single hero images work well for launches and updates.
- Landing pages and ads. A phone in hand next to the headline makes the product feel tangible.
Tips for a stronger presentation
- Tell a story, not a list. Order the screens the way a user would see them: open, act, get a result.
- Show multiple screens. Use a mix of single-phone scenes and multi-device layouts to show more of the app.
- Use real context. A phone in hand or on a desk helps people imagine using the app in daily life.
- Stay on brand. Match backgrounds and accent colors to the app's palette, so the visuals and the product feel like one thing.
- Keep the status bar clean. A neat time, full signal and full battery look better than a random screenshot with low battery.
- Don't overload a slide. One clear message per image beats five screens crammed together.
Common mistakes
- Wrong aspect ratio. Stretching an older screenshot into a newer phone distorts the UI. Export screens at the size of the device in the mockup.
- Mixing device generations. An old phone design next to a new one looks inconsistent. Pick one model for the whole set.
- Placeholder text left in. Lorem ipsum and "Title goes here" undermine an otherwise polished presentation. Use realistic content.
- Too much decoration. Extra drop shadows, glows and angled 3D effects distract from the app itself.
FAQ
What resolution should my app screenshots be?
Use the native resolution of the device shown in the mockup, or larger. Screenshots straight from a current iPhone or simulator are usually the right size.
Can I show several screens in one image?
Yes. Choose a mockup with two or more phones, or combine several single-phone exports into one layout. Multi-device mockups usually give each phone its own smart object, so you can place a different screen in each.
Can I use mockups for App Store screenshots?
You can use mockups in your store visuals and marketing, but check the store's current screenshot guidelines first, as they set rules on size and on what the images must show.
Do I need Photoshop?
Not necessarily. MOCKO opens PSD mockups on iPhone. See how to open PSD files on iPhone for details.
Conclusion
iPhone mockups are one of the fastest ways to make an app look real and finished. Prepare clean screens, pick a consistent set of scenes, place your design and build a short story around it. Ready to start? Explore our device mockups and find the right scenes for your next project.
Keep reading

Social Media Post Templates: Make Posts on iPhone in Minutes
How to choose and edit social media post templates on iPhone, keep a consistent feed, save your own templates and turn a PSD into...

PSD vs PSB: What's the Difference?
The difference between Photoshop's PSD and PSB formats, when each is used, why smart objects open as PSB, and how to open both on...

What Is a Smart Object? A Plain-English Guide for Mockups
What smart objects are, why every PSD mockup is built on them, how to edit one in Photoshop or on iPhone, and how to...